*
Winding Resistance Meter / Transformer Winding Resistance Meter / Resistance Meter, Winding Resistance tester / Calibration Facility.


We AJIT ELECTRONICS CORPORATION are Manufacturers, Exporters & Leading Suppliers of Winding Resistance meter, Transformer Winding Resistance Meter, Resistance Meter, Winding Resistance tester Loacated in Dombivli, Thane, Mumbai, India.
FEATURES :
| Sr No. | Range in Ohms | Current source |
| 1 | 0 – 2.9999 mΩ |
10 A |
| 2 | 0 - 29.999 mΩ |
10 A |
| 3 | 0 – 299.99 mΩ |
1 A |
| 4 | 0 – 2.9999 Ω |
100 mA |
| 5 | 0 – 29.999 Ω |
10 mA |
| 6 | 0 – 299.99 Ω |
1 mA |
» True 4 wire resistance measuring technique eliminates lead resistance errors inherent in 2 wire systems.
» Fully protected against over loads.
» Proven design.
» Not intended for heavy inductive loads.
MODEL |
TWRM 1 |
Display |
5 digit, RED Bright LED Display |
Range |
2.9999 mΩ to 299.99 Ω |
Resolution |
0.1 µΩ in Lowest resistance range. |
Test voltage |
12 V DC max. |
Power |
230 V AC, 50 Hz. |
4 Wire Measurement |
Yes |
Warm Up Time |
1 Min. |
Printer |
NO |
INTRODUCTION:
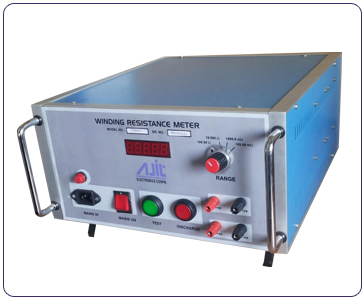
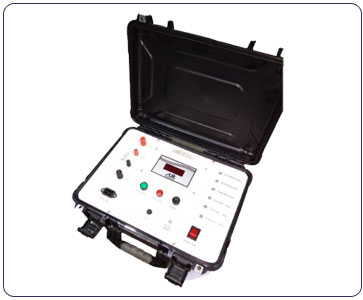
The Digital winding resistance meter is sophisticated, highly accurate, and user-friendly instrument. This instrument is suitable to test / measure the low resistance measurement of the transformer windings where the winding under test has a conductor which can carry 20 Amp DC current. The instrument works on Ohm’s law principle. A highly stable regulated DC power source with short circuit and over load protection is housed in the instrument. The regulated DC current is passed through the object under test and the voltage drop across the same is measured. The calculations as per Ohm’s law.
FRONT PANEL DETAILS:
1. Mains ON Switch: This a double pole single through rocker switch. The mains power to the instrument can be switched ON by operating this push button. The indication of the mains ON is built-in in to the rocker switch itself.
2. LED display: This is a 5 Digit RED Bright LED display on which all the measurements are available.
3. Range: This is a selector switch (Push Button) which should be in range of object resistance.
4. Reset/Test: After pressing RESET/TEST push button instrument goes in Test mode & Current flow will be start through object as per range. To Stop the test, again press the Reset / Test switch (Push Button).
5.Terminals: There are four banana terminals / jacks. Two terminals (Marked “I+ & I-) are provided to supply the DC voltage source to the transformer winding under test. The other two terminals (Marked “V+ & V-) are provided to receive the voltage drop across the winding under test.
SPECIAL INSTRUCTIONS BEFORE USING THE INSTRUMENTS
1.Please ensure that the winding under test is capable to carry at least 10 Amp DC current. If not, the winding may get damaged as a regulated 10 Amp DC current may flow through the winding under test once started.
2. Please ensure the mains supply source has a proper electrical earth and it is connected to the instrument.
3. Please do not operate the instrument without connecting the test leads to the object.
4. During testing all the connections to instrument end and the transformer winding end must be proper and tight. Loose connection leads to incorrect measurements.
OPERATING DETAILS:
• Open the instrument from the packing and observe for the safe arrival of the instrument before putting it ON.
• Please refer to the operating instruction manual in detail before putting the instrument ON.
• Once it is confirmed that the above points are OK then plug the mains cord to the 230V AC mains supply to the socket only where the electrical earthing is connected properly
• Connect Input Leads to the Load. Put the mains supply on by operating the mains ON rocker switch on the front panel. Select Range switch as per your Load resistance.
• RESET/TEST Push Button is configured to Start the Test and to Stop the Test. Now press Test push button to start measurement. The Instrument will take reading till Test Push Button not press again to Stop the Test.
• The instrument will measure the current flowing through the winding under test and the voltage drop across the winding under test simultaneously.
• According to the OHMs law the resistance value is calculated and displayed on the LED display
• The display indicated the resistance value Please see that the resistance value is reasonably stable.
• To Change the selected Range, Press Range Push Button, The LED Indication is defined for the selected Range.
Note: - During Test ON, you not able to change the Selected Range.


